Welcome to Elderfield Art Gallery Guide
Last updated: 2026-09-27 · 12 min read
The Art Gallery is Welcome to Elderfield's biggest collectible system: six rooms, twenty-seven paintings, and a required item list that reaches into fishing, ranching, foraging, mining, cooking, the Old Woods, the Catacombs and the game's random events. It is also the reason a 0.1% achievement exists. The gallery does not offer partial credit, so a painting that is short one item stays sealed and looks identical to one you never started. This page gives you the whole map: every painting, every item it wants, the reward it pays, and the order that stops you walking the same corridor six times.
The gallery is a set of haunted paintings, each of which is released by delivering a fixed list of specific items. There are six rooms: Blue (sea paintings, F1 left), Yellow (homestead, F1 centre), Green (farm seasons, F1 right), Purple (natural world, F2 left), Orange (adventure, F2 centre) and Red (quality items, F2 right). Completing one room is Art Restoration; completing the whole gallery is Supporting Arts & Culture — both 0.1% achievements. Do not work the gallery painting by painting. Work it system by system: pick the room that matches the gathering loop you have already built, finish it end to end, and treat the Red Room as the last one because it demands Void Star quality versions of items you have to produce deliberately.
How the Gallery Works
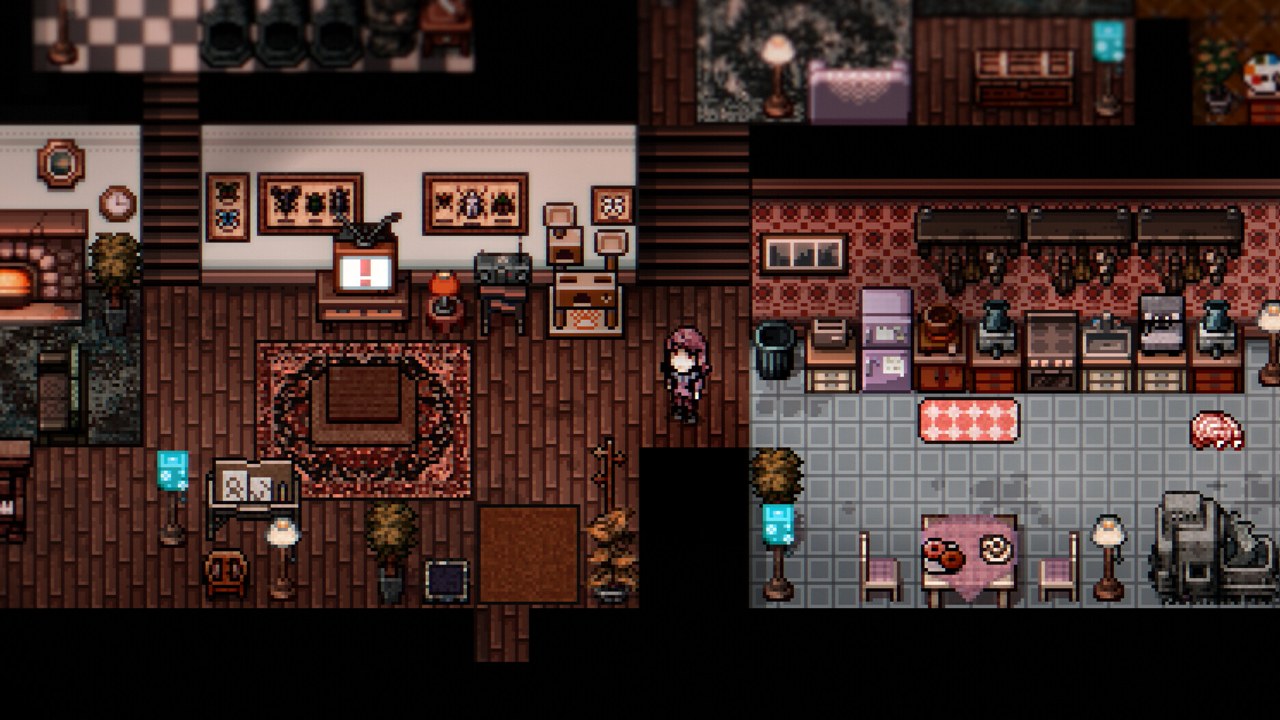
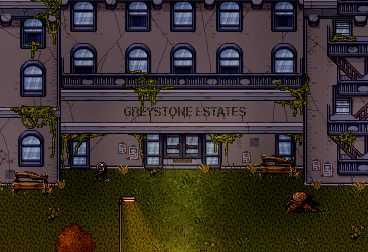
Each painting has a short list of named items — usually five or six — and it will not clear until the full list has been handed over. Room rewards work the same way at a larger scale. The practical consequence is that partial delivery is worth nothing, so the efficient approach is never "bring what I have"; it is "decide which paintings I can complete this week and collect the whole list before I go back".
Rooms are laid out across two floors, roughly grouped by theme rather than difficulty: the three rooms on F1 are the ones drawing on fishing, ranching and farming, and the three on F2 escalate into mining, combat drops and quality-graded goods.
| Room | Floor | Theme | Paintings | What it draws on |
|---|---|---|---|---|
| Blue Room | F1, left | Paintings of the Sea | 4 | Fishing and crab pots across four seasons |
| Yellow Room | F1, centre | Paintings of the Homestead | 6 | Ranching, preserving, the Drying Rack, nursery trees, cooking |
| Green Room | F1, right | Paintings of the Farm | 4 | One painting per season, including task-locked crops |
| Purple Room | F2, left | Paintings of the Natural World | 4 | Seasonal foraging, Old Woods mushrooms, smelted bars |
| Orange Room | F2, centre | Paintings of Adventure | 6 | Enemy drops, event rolls, cursed crops, bug catching, the Skulls |
| Red Room | F2, right | Paintings of Quality | 4 | Void Star quality fish, crops, animal products and aged goods |
The Room Order That Saves Trips
There is no in-game room order, and the paintings do not gate each other. Order is therefore entirely about which room your existing play already feeds. Work the rooms in this sequence:
- Purple Room — the mining one. If you are running the mines at all, you are already accumulating the ore and bars this room wants. It is the fastest room to clear in practice, and clearing it early banks the Art Restoration achievement.
- Blue Room — the fishing one. Four seasonal fish sets. If you fish, this is a passive collection job that fills itself over a year of play; if you do not fish, it is the room that teaches you why you should.
- Yellow Room — the homestead one. Ranching and preserving. The items here are produced rather than found, which makes this the room to start facilities for early even if you deliver late — a Preserving Barrel, a Keg and a Drying Rack all need to be running before the items exist.
- Green Room — the seasonal one. Four paintings, one per season, plus several crops gated behind named tasks. A full cycle of seasons is the minimum, so start it whenever and expect it to finish last of the F1 rooms.
- Orange Room — the adventure one. Six paintings built almost entirely out of enemy drops and event high rolls. Progress here is luck-limited, so keep it running in the background of everything else rather than farming it deliberately.
- Red Room — the quality one. Save it for the end. It wants Void Star quality versions of ordinary items, which means deliberate production rather than collection. See the notes on that room below.
Yellow and Red between them require a Preserving Barrel, a Keg, a Drying Rack, a Cooking Pot-style recipe chain and ageing. Those are facilities and recipes, not items you can find. The single most common reason the gallery stalls is a player who has collected every fish and every bar and then discovers the paintings also want Pickles, Jelly, Wine, Honey Mead, Gloom Ale and aged cheese. Start the facilities the day you decide to do the gallery — see the cooking guide for the production side.
Blue Room — Paintings of the Sea
On the first floor, on the left. All four paintings are fishing and crab-pot collections, and the room's rewards are reels — which is a genuinely useful outcome, because a better reel improves the very activity the room is testing.
| Painting | Items | Where they come from | Reward |
|---|---|---|---|
| 1. Crab Pot | Mud Snail, Starfish, Spiked Clam, Hermit Crab, Lake Mollusk, Stoneshell Crab | All six from Crab Pots in the Lakefront | Lucky Reel |
| 2. Seasonal Lakefront Fish | Lake Screamer, Midnight Crayfish, Glowfish, Blood Carp, Bottom-Feeder, Dust Crab | Lakefront day and night catches across Rebirth, Harvest and Witch — Lake Screamer (day, Rebirth/Harvest), Midnight Crayfish (night, Rebirth), Glowfish (night, Harvest), Blood Carp (night, Witch), Bottom-Feeder (day, Harvest), Dust Crab (day, Witch) | Sturdy Reel |
| 3. Seasonal Campsite Fish | Stoneshell Turtle, Koi Fish, Gold Sturgeon, Blerpfish, Manefish, Void-Floater | Campsite day and night catches: Stoneshell Turtle (night, Rebirth — also a Lakefront crab-pot catch), Gold Sturgeon (day, Rebirth), Blerpfish (night, Harvest), Manefish (day, Harvest), Koi Fish (day, Witch), Void-Floater (night, Witch) | Not recorded |
| 4. Rare Fish | Rot Puffer, Stalktopus, Ashball, Ancient Manta, Aetherfin, Ancient Angler | The game's rare fish: Rot Puffer in the Sewers, Stalktopus in the Mall, Ashball / Ancient Manta / Aetherfin at the Campsite, Ancient Angler in the Catacombs | Stealth Reel |
Note the shape of the Blue Room: three of its four paintings are season-gated, and one spans three zones. That makes the Blue Room a year-long passive job rather than a session. The one shortcut worth knowing is that the crate/rare painting can be attacked in parallel with everything else, because its six fish come from four different areas you will visit anyway. The fishing guide covers bait per water and the day/night windows.
Yellow Room — Paintings of the Homestead
First floor, centre. Six paintings, and the only room with a reward that applies to more than one painting: the first three paintings each pay Feathered Cap +5.
| Painting | Items | Where they come from | Reward |
|---|---|---|---|
| 1. Husbandry Gathering | Honey x5, Large Milk x5, Large Egg x5, Cloudberries x5, Large Goat Milk x5, Bat Guano x5 | Honey from Honey Trees in the Old Woods or Bee Boxes; Large Milk from highly affectionate cows; Large Egg from highly affectionate crows; Cloudberries from highly affectionate Tall Men; Large Goat Milk from goats; Bat Guano from Bat Boxes | Extra Pouch x3 |
| 2. Preserving Barrel and Keg | Pickles, Jelly, Wine, Honey Mead, Gloom Ale, Secret Sauce | Pickles preserve vegetables; Jelly preserves fruit; Wine is fruit in a keg; Honey Mead is Honey in a keg; Gloom Ale is Gloom Hops in a keg; Secret Sauce is ground Eyeballs | Cask x3 |
| 3. Drying Rack | Spiced Jerky, Spiced Sausage, Cured Spiced Steak, Basic Herb Bundle, Potent Herb Bundle, Rawhide | All six from the Drying Rack. The three spiced items and the Potent Herb Bundle additionally need Green Mushrooms from the Old Woods Cave | Cleansing Balm x8 |
| 4. Tree Fruits and Tree Seeds | Spiralberry, Fingerfruit, Void Plum, Tentacle, Hardwood Seed, Spiritwood Seed | Four fruits from Nursery Trees; Hardwood Seed drops from Hardwood Trees and Spiritwood Seed from Spiritwood Trees, both in the Old Woods | Cleansing Balm x8 |
| 5. Food (first set) | Hearty Stew, Fish Taco, Slayer's Feast, Rancher's Meal, Hunter's Meal, Angler's Meal | Recipes from several sources: Fish Taco is learned by talking to Edwin at the Notice Board; Rancher's Meal from the task "A Balanced Breakfast"; Hunter's Meal from tasks | Cleansing Balm x8 |
| 6. Food (second set) | Soothing Soup, Protein Shake, Fruit Salad, Filling Platter, Super Stew, Healthy Platter | Oven recipes unlocked by house upgrades (Soothing Soup, Filling Platter, Healthy Platter, and Super Stew which also needs a Slicer), Protein Shake from the Juicer after the first house upgrade, Fruit Salad a found Cooking Pot recipe | Not recorded |
Two structural things stand out. First, the Yellow Room is the room where affection levels are the real gate — everything in painting 1 says "highly affectionate", which is a husbandry progression check rather than a gathering one. Second, paintings 5 and 6 both want finished meals, and between them they need both house upgrades, the Juicer, the Oven and the Slicer. If your kitchen is still at the Cooking Pot stage, the Yellow Room is not a collection problem, it is a house-upgrade problem.
Green Room — Paintings of the Farm
First floor, right. One painting per season. Three of the four pay Dreampearl Seeds x2 and Dreamleaf Seeds x2, which is a strong argument for clearing them even if you do not care about the achievements.
| Painting | Items | Notes | Reward |
|---|---|---|---|
| 1. Rebirth | Wheat, Radish, Celery, Worm, Bean, Voidberry | Wheat, Radish, Celery and Worm grow in Rebirth, Harvest and Witch; Bean is unlocked by the task "Penpals"; Voidberry seeds come from chests | Dreampearl Seeds x2 + Dreamleaf Seeds x2 |
| 2. Harvest | Grape, Coffee Bean, Strawberry, Tomato, Dread Pepper, Watermelon | Grape is unlocked by "Childhood Fear", Coffee Bean by "Meet Sophia", Strawberry by "The Best Medicine"; Tomato, Dread Pepper and Watermelon are Harvest cash crops | Not recorded |
| 3. Witch | Pumpkin, Corn, Devilberries, Squash, Gloom Hops, Peas | Gloom Hops is unlocked by "Bug Catching"; Peas are sold only on Harvest 27 at the Great Harvest Festival — a genuinely missable item | Dreampearl Seeds x2 + Dreamleaf Seeds x2 |
| 4. Death | Tooth, Ghostberries, Deathleaf, Leadleaf, Eyeball, Soulfruit | Tooth is harvested from the Toothbush across Harvest, Witch and Death; Ghostberries and Deathleaf are Death cash crops; Leadleaf and Eyeball are all-season; Soulfruit seeds come from chests | Dreampearl Seeds x2 + Dreamleaf Seeds x2 |
The Peas entry is the one to write down. Harvest 27 is the Great Harvest Festival, it comes once per year, and there is no other source. If you are planning the Green Room and you have not bought Peas at the festival, painting 3 cannot be finished until the next year — so buy it the next time the opportunity comes round, whether or not you are working on the gallery yet.
Purple Room — Paintings of the Natural World
Second floor, left. Seasonal foraging, Old Woods mushrooms and smelted bars. This is the room that overlaps most heavily with the mining loop, which is why it belongs first in your route.
| Painting | Items | Where they come from | Reward |
|---|---|---|---|
| 1. Seasonal Gatherables | Bitterherb, Red Mushroom, Bloodberries, Sunflower Seeds, Dead Leaves, Snow Pearls | Open-world forage: Bitterherb and Red Mushroom in Rebirth, Harvest and Witch; Bloodberries in Rebirth; Sunflower Seeds from Sunflowers in Harvest and Witch; Dead Leaves and Snow Pearls in Death | Greater Offering of Rain x2 |
| 2. Mushrooms | Bulbous Mushroom, Night-Hood Mushroom, Dual-Sprout Mushroom, Golden Mushroom, Gravemoss, Ancientwood | Four mushrooms from the Old Woods; Gravemoss from the Catacombs; Ancientwood | Potion of Everything x3 |
| 3. Mining Bars | Coal x15, Salt Rock x10, Copper Bar x5, Iron Bar x5, Gold Bar x3, Void Bar x1 | Coal, Salt Rock and Copper from Molly's mine onward; Iron and Gold from the Mall onward; Void from the Mall onward | Flask of the Gods (HP) x3 |
| 4. Complex Mining Bars | Green Crystal x5, Verdite Bar x3, Platinum Bar, Gold Plate x2, Steel Bar x2, Blacksteel Bar | Green Crystal, Verdite and Platinum are Old Woods Mines materials (Platinum on 3F only); Gold Plate, Steel Bar and Blacksteel Bar come from the Catacomb Mines' Blast Kiln chain | Not recorded |
Painting 4 is the room's real progression gate, and it is why the Purple Room is not actually "the easy one" if you are early: Platinum only spawns on Old Woods Mines 3F, and the Catacomb bars require the Blast Kiln with its Energy costs. Painting 3, on the other hand, is genuinely cheap — it is 15 Coal, 10 Salt Rock and thirteen bars of common metal, all of which a mid-game mining loop produces as a by-product.
Orange Room — Paintings of Adventure
Second floor, centre. Six paintings, and the hardest room to complete on purpose, because it is built from enemy drops and event high rolls. The school guide matters here — that is where the Apple comes from.
| Painting | Items | Where they come from | Reward |
|---|---|---|---|
| 1. Body Parts | Mysterious Ooze, Brain, Viscera, Creature Claw, Bloody Skin, Entrails | Common enemy-drop organ items from fights across the game | Lucky Die x2 |
| 2. Unique Enemy Drops | Soulroot, Goldpuff, Rune of the Dead God, Corrupted Tar, Hard Bones, Apple | Soulroot and Goldpuff are Old Woods enemy drops; Rune of the Dead God, Corrupted Tar and Hard Bones are Catacombs drops; Apple is a rare drop from Teacher's Pet at Elderfield High | Not recorded |
| 3. Unique Event Drops | Godscale, Spectral Rain, Sign of Death, Beating Heart, Voidsphere, Staring Orb | Godscale from the Weird Fish enemy; Spectral Rain from the Rainman; Sign of Death from the Fallen Angel and Catacombs enemies; Beating Heart a high roll in the Pointing Fingers news event; Voidsphere a high roll in the Staircase event; Staring Orb a high roll in the Staring Woman event when you answer correctly | Recall Potion x5 + Treasure Casket x5 |
| 4. Cursed Drops | Duskmelon, Duskberries, Eldersprout, Cursed Milk, Goat Horn, Wishbone | Duskmelon, Duskberries and Eldersprout are cursed crops (Rebirth/Harvest/Witch); Cursed Milk is milked from the "Cow" on All Hallow's Eve; Goat Horn from a unique event when you talk to your goat; Wishbone a drop from certain enemies in the Mall and Farm | Love Potion x5 + Treasure Casket x5 |
| 5. Bugs | Nightcrawler x5, Dustfly x5, Shadewing Moth x5, Bloodwing Moth x5, Pale Empress Moth x5, Firefly x5 | Five of the six are Old Woods bug-net catches (five of each); Firefly is a Catacombs bug-net catch, or a drop from a T2 Bait Box | Not recorded |
| 6. Skull | Skull of the Mall, Skull of the Old Woods, Skull of the Catacombs, Skull of the Deep, Skull of the Lost, Skull of the Dark | Skull of the Mall comes from completing the main Mall tasks; Skull of the Old Woods from the main Old Woods tasks; the remaining four have no listed source | Not recorded |
The Orange Room is where the gallery stops being a gathering project and becomes a completion record. Paintings 3 and 4 specifically want high rolls — a 5 or a 6 on an event table — which is why this room is best kept running in the background across a whole playthrough rather than attempted in a session. Its two biggest rewards (Recall Potion x5 and Love Potion x5, both with Treasure Caskets) are genuinely valuable consumables, so the passive approach pays while it waits.
Painting 6 is the one with a documentation gap worth flagging: two of the six Skulls are tied to the main task lines in the Mall and the Old Woods, and the other four have no published source. If you are down to a single Skull, that is a known gap rather than something you have missed.
Red Room — Paintings of Quality
Second floor, right. The Red Room is about Void Star quality — the game's top quality grade — applied to items you already know how to make. This is the room to do last, because it is not a collection task, it is a production task.
| Painting | Items | What it demands | Reward |
|---|---|---|---|
| 1. Fish | Mud Perch, Fog Eel, Stalktopus, Razorfish, Ancient Pike, Corpsefish | Mud Perch from the Lakefront; Fog Eel from the Lakefront with Leech Bait; Stalktopus from the Mall with Bug Bait; Razorfish (base) and Ancient Pike (uncommon) at the Campsite; Corpsefish a base Lakefront/Campsite catch during the Season of Death, or a rare Lakefront catch | Not recorded |
| 2. Farming | Celery, Pumpkin, Grapes, Tomato, Corn, Ghostberries | Ordinary crops at Void Star quality — a total across all four seasons, so it needs a full year | Crystal Flask + Treasure Casket x5 |
| 3. Husbandry | Egg, Large Milk, Large Goat Milk, Cloudberries, Cheese, Mayonnaise | Egg from highly affectionate crows; Large Milk and Large Goat Milk from highly affectionate animals; Cloudberries from highly affectionate Tall Men; Cheese a random result from Large Milk and Mayonnaise a random result from Large Egg | Crystal Flask + Treasure Casket x5 |
| 4. Aged | Aged Cheese (Artisan), Aged Cheese (Perfect), Aged Goat Cheese (Artisan), Aged Goat Cheese (Perfect), Aged Gloom Ale, Aged Honey Mead | Ageing, at both Artisan and Perfect grade, across cheese, goat cheese, ale and mead — four separate production lines running at once | Not recorded |
The Aged painting is the single most demanding item in the gallery, because it is the only one that asks for two grades of the same product. Everything else in the Red Room at least comes out of a loop you are already running; the Aged set wants a deliberate cheese, goat-cheese, ale and mead operation left running long enough to hit the top grades.
The Two Art Achievements
| Achievement | Requirement | Global completion |
|---|---|---|
| Art Restoration | Complete one full room of the Art Gallery | 0.1% |
| Supporting Arts & Culture | Complete the Art Gallery | 0.1% |
Because Art Restoration only needs one room, it is dramatically easier than its 0.1% figure suggests — the rarity is a measure of how many players find the gallery at all, not how hard a single room is. The Purple Room is the cheapest route to it in practice, since its painting 3 is common-metal bars and its painting 2 is four Old Woods mushrooms. Pick whichever room your current loop already feeds and you can convert a 0.1% achievement into an afternoon's work.
The completionist picture is in the achievements guide, which groups the gallery, the school scenarios and the ten-heart relationships together as the game's "no partial credit" checks.
Gallery Problems and Fixes
| Problem | Cause | Fix |
|---|---|---|
| I delivered items and the painting is still incomplete | Paintings need the full list, not a partial set | Collect the whole list before travelling back. There is no partial credit |
| Which room should I do first | There is no gating, only efficiency | Purple if you mine, Blue if you fish, Yellow if you ranch. Red last |
| I have every fish but the painting needs Pickles and Wine | The Yellow Room wants preserved and aged goods, not raw ingredients | Build the Preserving Barrel and Keg first — see the cooking guide |
| Green painting 3 is stuck on Peas | Peas are sold only on Harvest 27 at the Great Harvest Festival, once a year | Buy them at the next festival whether or not you are working on the gallery yet |
| I cannot find the Apple for the Orange Room | It is a rare drop from Teacher's Pet | That enemy is at Elderfield High — see the school guide |
| Purple painting 4 needs Platinum and I cannot find any | Platinum Ore only spawns on Old Woods Mines 3F | Unlock the Old Woods and work down to the third floor — see the mining guide |
| I cannot get the event items | Beating Heart, Voidsphere and Staring Orb are high rolls on event tables | These are luck-gated. Reread the TV report each day and take every event you see |
| How hard is Art Restoration really | It needs one room only | Far easier than 0.1% implies. Pick the Purple Room and clear its painting 3 |
| Do I need the gallery for anything else | Its rewards are reels, extra pouches, potions and flasks | Several are best-in-class utility items — the Lucky and Stealth Reels in particular improve the fishing the Blue Room tests |
Did this answer your question?
What was missing?
Thanks — noted.
Images on this page are from the Welcome to Elderfield Wiki, used under CC BY-SA 4.0.